

Blog
Detective Scavenger Hunt: The Ultimate Planning Guide + 30 Free Clue Ideas

Detective Scavenger Hunt: The Ultimate Planning Guide + 30 Free Clue Ideas
Arne · 24 min read · Published: May 06, 2026
A detective scavenger hunt is where mystery meets adventure. Unlike a standard treasure hunt where kids search for items, a detective hunt puts children in the role of investigators solving a fictional mystery. They’re gathering evidence, interrogating suspects, decoding clues, and identifying the culprit who “stole” the treasure. The difference? Kids feel like they’re detectives working a real case, not just following directions.
Use this guide to build your own clue-based hunt. For the wider celebration, our detective party planning hub covers games, decorations and snacks.
If you’ve ever watched a child’s face light up when they realize a fingerprint matches the suspect’s prints, or when they decode a message to discover the next location, you understand why detective hunts are one of the most engaging party activities available. This guide covers everything: how to set up your hunt, which age groups benefit most, and 30 ready-to-use detective clues organized by difficulty and type.
Whether you’re planning a spy scavenger hunt for kids, a mystery treasure hunt, or a full-blown detective case, you’ll find the exact framework and clues to run a flawless hunt in your home, backyard, or party venue.
Why Detective Scavenger Hunts Are the Gold Standard
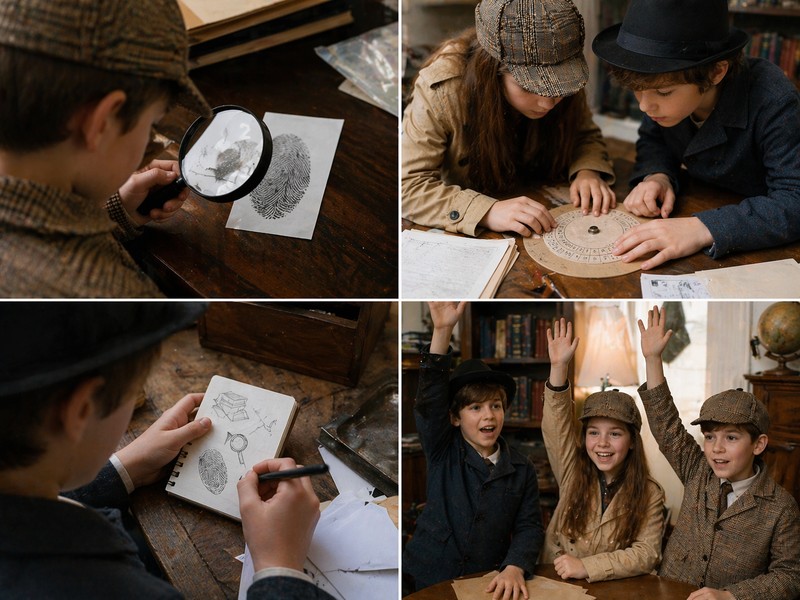
Detective hunts work better than most party activities because they solve multiple problems at once. First, they’re inclusive. Every kid involved is thinking, searching, and contributing to solving the mystery. The shy kid who won’t play group games? They’re fully engaged when they’re analyzing evidence. The hyperactive child who can’t focus? They’re channeling that energy into a concrete mission.
Second, detective hunts create deeper engagement than generic scavenger hunts. Instead of just “find these items,” the narrative is “help Detective [Name] solve the case.” That story transforms a simple hunt into an immersive experience. Kids aren’t just following clues—they’re playing a character with a goal.
Third, detective hunts teach problem-solving skills naturally. Kids work with codes, analyze fingerprints (even if it’s fake), match witness testimony to locations, and eliminate false leads. These are real detective techniques packaged in a kid-friendly format.
Finally, detective hunts are memorable. Years later, kids will say “remember when we solved that mystery?” More than other party games, this sticks in memory because kids were active participants in their own story.
30 Detective Scavenger Hunt Clue Ideas (Ready to Use)
These 30 clues are organized by type and difficulty. Use them exactly as written, or adapt them to your specific locations. Each clue points to a location where the next clue is hidden.
Location Riddle Clues (Beginner to Intermediate)
Clue 1: The witness saw the suspect beside a folded blanket on the sofa. Where should you look?
Answer: Beside the folded blanket on the sofa; no heat source is part of this clue.
Clue 2: “Detective, the security camera shows the thief hiding something in a place where we keep food cold. What appliance keeps milk and leftovers fresh?”
Answer: Refrigerator
Clue 3: “Witness statement: ‘I saw them sneaking past where we relax and watch movies.’ Find this room and search the cushions.”
Answer: Living room sofa or couch
Clue 4: “The suspect was spotted near a place where people sit and read books. Where would you find a collection of stories?”
Answer: Bookshelf or library
Clue 5: “Evidence shows the criminal hid the treasure where we sleep at night. What room has beds?”
Answer: Bedroom (check under the bed or in the closet)
Clue 6: “The suspect was caught on camera reaching into a place we use for eating. Where do we sit for meals?”
Answer: Dining table or kitchen table
Clue 7: “Fingerprints match a surface in the room where we take showers. What’s that room called?”
Answer: Bathroom (check the shower door, sink, or towel rack)
Clue 8: “The thief left a clue near where we hang our coats and jackets. What’s that storage area?”
Answer: Coat closet or entryway closet
Clue 9: Detective, the next clue is parked beside a drawing of a car. Find the picture on your detective table.
Answer: Beside a paper car picture on the activity table. Do not search real vehicles, garages or driveways.
Clue 10: The suspect was spotted beside the placemats where we sit down to eat. Find the next clue on that table.
Answer: Dining table; keep the hunt away from cooking appliances.
Fingerprint & Evidence Clues (Intermediate)
Clue 11: “Fingerprint analysis matches the suspect’s prints to the handle of an appliance used for keeping food cold. Check the refrigerator door handle for the next clue.”
Answer: Refrigerator handle
Clue 12: “The suspect’s fingerprints were found on a surface used for writing. Search your desk drawer or the notepad holder for evidence.”
Answer: Desk or writing surface
Clue 13: “Prints match a surface in the bathroom—specifically where we brush our teeth. Check above the sink.”
Answer: Bathroom mirror or sink area
Clue 14: The thief left a clue beneath a drawing of a clock. Find the picture on your detective table.
Answer: Under a paper clock picture on the activity table; do not move or reach for a wall clock.
Clue 15: A paper card on the detective table has the same drawn swirl as the suspect card. Compare the patterns and turn over the matching card.
Answer: The reverse of the matching paper card. Prepare one matching pair and two different patterns; do not put powder or clues on electrical fittings.
Coded Messages (Beginner Code Cipher)
Clue 16: “DECODE THIS MESSAGE (ROT13 cipher): PBHPU (Answer: COUCH)”
Text on card: “Agent, crack this code: PBHPU. That’s where your next clue is hidden.”
Answer: COUCH
Clue 17: “ROT13 Code: YBBX BA GUR PYBFRG SYBBE (Answer: LOOK ON THE CLOSET FLOOR)”
Answer: LOOK ON THE CLOSET FLOOR
Clue 18: “Simple A=1 substitution cipher: 8-9-4-4-5-14 (H-I-D-D-E-N). Your next clue is [location]. Follow these coordinates: 5-1-19-20 (E-A-S-T).”
Answer: HIDDEN or specific location like “EAST”
Clue 19: “Caesar Cipher (shift 3): ORRN XQGHU WKH EHG (Answer: LOOK UNDER THE BED)”
Answer: LOOK UNDER THE BED
Clue 20: “Detective code—read every second letter, starting with the second character: XBXOXOXKXSXHXEXLXF (Answer: BOOKSHELF). That’s your location.”
Answer: BOOKSHELF
Alibi-Based Clues (Intermediate to Advanced)
Clue 21: At 3 PM, Suspect A says she was in the bedroom, Suspect B says he was at the bookshelf, and Suspect C says she was at the kitchen table. Two witnesses confirm A and C. A photo taken at 3 PM shows B in the hallway, not at the bookshelf. Exactly one suspect lied about their location. Who was it? Search the place that suspect claimed to be.
Answer: Suspect B; hide the next clue on a low, reachable bookshelf.
Clue 22: “Witness testimony: The thief was seen talking to someone who works with books. They said they were ‘reading together.’ Where would two people sit and read?”
Answer: Bookshelf, library, or reading nook
Clue 23: “The suspect claims they were in the ‘cold place’ all afternoon. But the security camera shows them leaving it at 3 PM. Which appliance is the cold place? That’s where the next clue is hidden.”
Answer: Refrigerator
Clue 24: The suspect says they were at the bookshelf at 3 PM. A witness saw them at the dining table at that same time. The next clue is at the place named by the witness. Where should you look?
Answer: Dining table. This identifies the next location; the host must decide separately what it means for the story.
Photo & Visual Clues (Intermediate to Advanced)
Clue 25: A photo shows an empty cereal box on the breakfast table. Find that box and look beside it.
Answer: Beside the empty cereal box on a reachable table. The host places the box there before the game; no shelves or cupboards need to be climbed.
Clue 26: “The suspect was photographed hiding something under soft, fabric surfaces. In what room would you find pillows and blankets?”
Answer: Bedroom: check beside a pillow or folded blanket placed within reach. Do not lift mattresses or move furniture.
Clue 27: “PHOTO EVIDENCE: This image shows the suspect near a round object used for telling time. Find the object that matches and look behind it.”
Answer: Clock (print a photo of a clock if available, kids match it to an actual clock)
Clue 28: “The crime scene photo shows the thief near a door. Specifically, they’re standing in front of something that opens and closes. Your next clue is taped to the [FRONT DOOR/CLOSET DOOR].”
Answer: A specific door you designate
Advanced Multi-Step & Red Herring Clues (Ages 10+)
Clue 29: Three notes suggest three places: Note A says SOFA, Note B says TABLE, and Note C says TOY BOX. Your case file says the genuine note has a five-letter location and contains the letter B. Which note is genuine?
Answer: Note B: TABLE. SOFA has four letters; TOY BOX has six letters when the space is ignored. Hide the next clue on the table. Copy the case-file rule onto the player card so the puzzle can be solved without guessing.
Clue 30: “The final challenge: Three locations match the clues below. ONLY ONE has the treasure. Suspect A: ‘I hid it where we read.’ Suspect B: ‘I hid it where we eat.’ Suspect C: ‘I hid it where we sleep.’ You’ve been following Suspect C’s trail. Where should the treasure be? (Answer: Bedroom, because you’ve been following Suspect C.)”
Answer: Bedroom or the designated final location that matches Suspect C
Setting Up Your Detective Scavenger Hunt
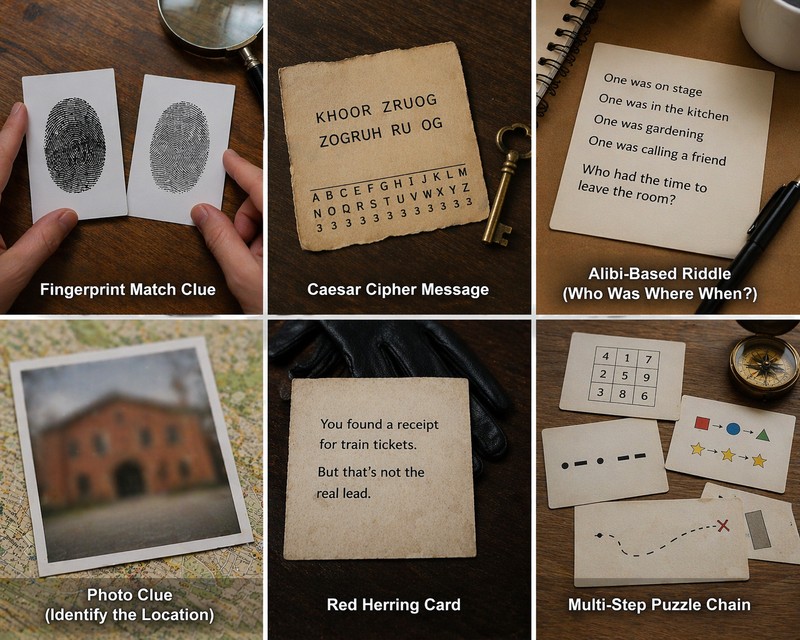
Here’s the step-by-step process to transform these clues into a working hunt.
Step 1: Choose Your Crime Story (10 minutes)
Decide what was “stolen” and who the suspects are. Some options:
- “The birthday cake was stolen! Help Detective [Child’s Name] find the culprit.”
- “The treasure chest has disappeared! Three suspects claim innocence. Find the real thief.”
- “A mysterious artifact has been taken from the museum. You’re secret agents on a recovery mission.”
- “Someone stole the party decorations! Can you identify the criminal before the party starts?”
Pick one and write it down. This is your opening briefing that you’ll read to the kids.
Step 2: Plan Your Locations (15 minutes)
Walk through your home or venue and identify 8–16 hiding spots depending on age. Choose from:
- Under beds
- Inside closets
- Behind doors
- Under couch cushions
- On a low, reachable bookshelf
- Inside drawers (not locked)
- Taped to mirrors
- Beside a paper prop on the kitchen table, away from appliances
- Behind curtains
- In a toy box or storage bin
An adult should check the route and supervise the game. Mark the play area and explain that only the prepared paper clues are part of the hunt. Keep clues within easy reach: no climbing, moving heavy furniture, touching electrical fittings, opening appliances, approaching heat or water, or searching real vehicles. Keep exits clear. Replace any unsuitable location with a picture card on the activity table.
Step 3: Select Your Clues (15 minutes)
Choose 8–16 clues from the 30 provided above. Mix clue types: some location riddles, some fingerprint clues, some coded messages. Variety keeps kids engaged. Write each clue on an index card or print on card stock.
Step 4: Create Supporting Materials (20 minutes)
To make your hunt feel official, create:
- A suspect board: Print photos or draw pictures of 3–5 suspects. Label them “Suspect A,” “Suspect B,” etc. Post on a wall.
- Detective badges: Print or draw simple badges for each child to wear.
- Evidence envelopes: Use small envelopes (or make them from folded paper) to seal clues inside. Write “EVIDENCE #1,” “EVIDENCE #2,” etc.
- Crime scene tape: Print a banner or use caution tape to mark the starting location.
- Fingerprint analysis sheets: Print fingerprint templates so kids can compare the suspect’s prints to found prints (you can draw these, or use the provided templates).
Step 5: Hide Clues in Reverse Order (15 minutes)
Put the treasure at your final location. Hide the clue that leads to it at the previous location. Continue working backward, placing each clue where the preceding clue tells players to look. Keep the first clue to hand to the players at the start. For example: hand out a clue leading to the sofa; at the sofa, place a clue leading to the table; at the table, place a clue leading to the toy box; put the treasure in the toy box. Walk the complete route yourself before the game and keep an answer list.
Step 6: Create Your Briefing (5 minutes)
Write a short opening statement to set the tone. Example:
“Detectives, thank you for arriving on time. A crime has been committed: [THE THEFT]. We have three suspects, but only one is guilty. Your mission: follow the evidence, solve the clues, and find the treasure before the culprit escapes. Are you ready? Here’s your first clue.”
Step 7: Run the Hunt (30–60 minutes)
Read your briefing. Hand out detective badges. Divide kids into teams if desired (teams of 2–3 work best). Give the first clue and let them go. Stay nearby to offer hints if they get stuck, but resist the urge to help too quickly. The struggle is part of the fun.
Step 8: Celebrate the Solve (10 minutes)
When they find the treasure and “catch the criminal,” make it a big moment. Applaud, take photos, let them open the treasure, and reveal the twist if there is one (e.g., “The ‘thief’ was actually hiding the treasure to surprise everyone”).
Detective Scavenger Hunt by Age Group
Age makes a huge difference in hunt complexity, clue type, and engagement level.
Ages 6–8: Introductory Detective Hunts
Kids this age are developing reading skills and can handle simple riddles. Use 5–8 clues maximum. Stick to location riddles (Clues 1–10) and avoid codes or complex logic. Hunts last 20–30 minutes. Suspects should be simple: maybe just 2–3 options. Example hunt: “The cake thief is hiding in the kitchen, bedroom, or living room. Each location has a clue.”
Best clues for this age: 1–10 (location riddles)
Hunt duration: 20–30 minutes
Number of suspects: 2–3
Ages 9–11: Intermediate Detective Hunts
Kids this age love feeling clever. They can decode simple messages, work with fingerprints, and handle 8–12 clues. Hunts last 30–45 minutes. Introduce codes (ROT13, simple substitution), fingerprint analysis, and alibi challenges. They start enjoying red herrings (false leads) if explained clearly. Use 3–4 suspects with distinct “alibis.”
Best clues for this age: 1–24 (location riddles, fingerprints, codes, alibis)
Hunt duration: 30–45 minutes
Number of suspects: 3–4
Ages 12+: Advanced Detective Hunts
Teenagers want a real challenge. Use 12–18 clues, introduce more sophisticated codes, multi-step logic puzzles, and complex alibis. Hunts can stretch 60+ minutes. This age appreciates narrative depth: maybe the “thief” isn’t actually guilty, or there’s a twist ending. Use 4–5 suspects with detailed alibis and background stories.
Best clues for this age: All clues, especially 21–30 (advanced logic, multiple suspects, red herrings)
Hunt duration: 45–75 minutes
Number of suspects: 4–5
Props and Atmosphere: Making Kids Feel Like Real Detectives
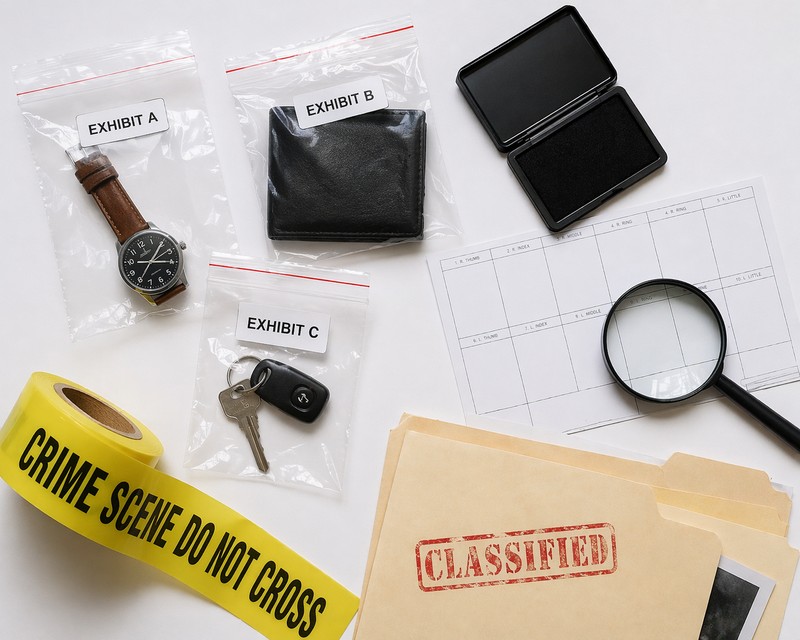
The physical setup matters. Simple props transform a hunt from “find clue cards” into “I’m actually a detective.”
Essential Props
Detective badges: Print simple badges from the template provided, or make them from cardboard and decorate with markers. Each child wears one throughout the hunt. This instantly makes them feel official.
Crime scene tape: Use caution tape or print a banner to mark the starting location and “crime scene.” This visual cue signals “something important is happening here.”
Suspect board: Draw or print photos of suspects and post on the wall near the starting point. Include names, “alibis,” and even fictional details like “Height: 5’8” or “Last seen wearing…”. Kids reference this while solving.
Evidence envelopes: Don’t just hand out loose clue cards. Seal clues in envelopes labeled “EVIDENCE #1,” “EVIDENCE #2,” etc. This makes clues feel official and creates a ritualistic element: “We found evidence!”
Paper fingerprint-pattern cards: Draw several different swirl patterns on index cards. Make one duplicate as the matching clue. Children compare the drawings and identify the pair; no powders, glass props or real fingerprint collection are needed.
Investigation sheets: Print simple detective logs where kids write clue solutions, suspect theories, and observations. Gives kids something concrete to hold and work on.
Optional Atmosphere Boosters
- Play spy or detective movie background music softly during the hunt
- Set up a “detective headquarters” table with supplies: magnifying glasses, notepads, pencils, fingerprint kit
- Dress as a police officer or detective yourself (optional but effective for 6–9 year-olds)
- Use UV light (blacklight) to reveal “hidden” messages written in invisible ink
- Create “case files” with photos of the crime scene and suspect list
- Use a phone or walkie-talkie as a “detective radio” to give hints
Forensic Activities Kids Can Actually Do (with Stuff You Already Own)
What separates a detective hunt from a regular treasure hunt is the forensic work. The 4 activities below add 5–10 minutes each to your hunt, cost almost nothing, and turn kids from clue-followers into real investigators. Drop one or all of them into your hunt depending on age and time.
1. Paper Fingerprint-Pattern Matching
What you need: Paper or index cards and a pencil. Prepare three different drawn patterns and one duplicate of the pattern assigned to your fictional suspect.
How it works: Put the three suspect-pattern cards on the detective table and the matching evidence card at one prepared station. Ask players which pattern matches and what details they compared. Use invented names and drawn patterns, not real fingerprints. This is a visual matching game, not a forensic identification test.
Why kids love it: It looks like real CSI work. They genuinely don’t know if it will work, so the moment a print appears feels like magic.
2. Footprint Analysis (Ages 6+)
What you need: A small tray, a thin layer of flour or fine sand, a ruler.
How it works: Before the hunt, press a shoe (yours or a sibling’s) into the flour-filled tray to leave a clear print. On a separate card, write the dimensions of three “suspect shoes” (e.g., Suspect A: 22 cm, Suspect B: 26 cm, Suspect C: 28 cm). Kids measure the crime-scene print and match it. The matching suspect’s name appears in the next clue.
Pro tip: Place the tray on a tray-sized table covered in newspaper. Cleanup is 30 seconds.
3. Handwriting Comparison (Ages 8+)
What you need: 3 short notes (“I did it. Sorry!”) each written in a slightly different style, one matching a labelled suspect-handwriting card.
How it works: Hide the “ransom note” near the first clue. At the suspect-board station, kids compare letter shapes (especially distinctive letters like t-crossings, lowercase e, capital I) to the three handwriting samples. The matching suspect is the culprit — or, even better, the matching suspect is innocent and someone copied their style. Now it’s a real puzzle.
4. Hair, Fiber & Object Match (Ages 6+)
What you need: Three different items left behind (a red ribbon, a yellow button, a strand of yarn) plus a “suspect inventory” card showing what each suspect was wearing or carrying.
How it works: Kids find one piece of evidence at the crime scene. They cross-reference with the inventory card. Only one suspect was wearing the matching item. This activity works brilliantly for younger detectives because the logic is simple but the satisfaction of “catching” the suspect is identical to harder activities.
Cipher Library: 5 Detective Codes Worth Knowing
Real detectives crack codes. Kids feel like real detectives when they crack codes. The 5 ciphers below cover every age from 6 to 14 — print the reference card, give it to your young detectives, and watch them work.
Detective’s Cipher Reference Card
Print this and tuck it into the case-file folder. Kids reference it as they decode each clue.
- Caesar Cipher (shift 3): Each letter shifts 3 positions forward. A→D, B→E, C→F. “HELLO” becomes “KHOOR”. Best for ages 8–10.
- ROT13: Same idea, but shift 13. The cipher is self-reversing — running ROT13 twice gives the original. “HELLO” becomes “URYYB”. Best for ages 9–11.
- A1Z26 (Number Substitution): A=1, B=2, … Z=26. “HELLO” becomes “8-5-12-12-15”. Best for ages 6–8 — easy maths, no shift confusion.
- Morse Code: Dots and dashes. “SOS” is ··· ——— ···. Print a Morse chart on the reference card. Best for ages 10+ — takes patience.
- Pigpen Cipher: Letters mapped to grid positions. Looks like a secret language. Best for ages 9+ — visual, beautiful on paper, kids feel like medieval spies.
Want the full how-to with worked examples, decoder wheels and printable practice sheets? Read our Caesar Cipher for Kids guide — it includes a free Cipher Wheel PDF and practice worksheets that pair perfectly with the detective hunt.
5 Ready-to-Use Suspect Profiles
The fastest way to make a hunt feel real is to give kids people to suspect. Print these five profiles, post them on a “suspect board” near the start of the hunt, and let kids cross out names as they eliminate suspects. Each profile includes the alibi, the motive, and one distinguishing detail kids can match against evidence.
Suspect A — “The Cousin”
Age: 14. Alibi: Says she was reading in the bedroom from 2–3 PM. Motive: She lost a bet with the birthday kid yesterday. Tell: Wears a red scrunchie. Match if: red fiber found on a clue.
Suspect B — “The Neighbor”
Age: 11. Alibi: Claims he was in his own garden — but no one saw him there. Motive: Wasn’t invited to the party. Tell: Always wears muddy sneakers. Match if: muddy footprint found.
Suspect C — “The Dog Walker”
Age: 16. Alibi: Walked past the house at 2:30 PM — confirmed by camera. Motive: None obvious — the red herring. Tell: Carries a clipboard. Match if: paper-clip evidence (a red herring).
Suspect D — “Aunt Margaret”
Age: 42. Alibi: Says she was “in the kitchen helping” — but the kitchen camera shows she left at 2:15. Motive: Disagrees with the birthday kid about cake flavour. Tell: Strong perfume. Match if: a perfumed napkin found near the scene.
Suspect E — “The Babysitter”
Age: 19. Alibi: Was on her phone — phone records confirm. Motive: Hungry. Tell: Left a phone charger plugged in. Match if: a phone charger appears in the crime scene photo.
You decide which suspect is guilty before the hunt starts. Plant evidence that matches that suspect’s “tell”. When kids piece it together, the moment of accusation is the climax of the entire afternoon.
Interrogation Script: 12 Questions Kid Detectives Ask
Once kids have narrowed their suspect list to 2 or 3, an “interrogation” station is where the case is solved. You (or another adult) plays the suspect; kids ask the questions. Honest answers, fake answers, evasive answers — mix them up. Here are the 12 questions that consistently work, grouped into 4 phases.
Opening (build rapport):
- “Can you tell us your full name and what you were doing this afternoon?”
- “When did you arrive at the house today?”
- “Who can confirm where you were?”
Movement (locate the suspect):
- “Which rooms did you visit between 2 and 3 PM?”
- “Did you go near the kitchen at any point?”
- “Did you see anyone else acting strangely?”
Alibi probe (find inconsistencies):
- “You said you were in the bedroom — what were you doing exactly?”
- “What was the last time you checked your phone?”
- “Was anyone else in the room with you?”
Pressure (the confrontation):
- “We found a [red fiber / muddy footprint / perfumed napkin] at the scene. Can you explain it?”
- “You said you were [reading / outside / on your phone]. But [contradicting evidence]. Which is the truth?”
- “Last chance to tell us what really happened.”
Coach younger detectives to write down each answer in their notebook. The contradiction between answers 4 and 7 (or 1 and 11) is usually where the case cracks open.
3 Complete Crime Story Templates (Steal These)
Skip the “what should the crime be?” decision paralysis. Below are three fully written stories — opening briefing, suspects, evidence trail, and reveal — that you can run as-is or remix.
Story 1: The Missing Birthday Cake (Ages 6–9)
Setup: The birthday cake disappeared from the kitchen counter 30 minutes before the party. The frosting fingerprint on the fridge handle says someone with sweet teeth touched it. Three suspects: the older sibling, the cousin, the family dog.
Evidence trail: A drawing of a frosting smudge on a paper clue → a paper cake picture on the activity table → a clue beside a sofa cushion → a paper cake prop and confession note in an open toy basket. Keep the real cake with an adult until serving.
Twist: The “guilty” suspect was actually hiding the cake to surprise everyone with candles.
Story 2: The Museum Heist (Ages 9–12)
Setup: A priceless “ancient coin” (any chocolate coin works) has been stolen from the home museum. Security tape was found broken. Four suspects, four conflicting alibis. The thief has left three clues, but one is a deliberate decoy.
Evidence trail: Encoded note in Caesar Cipher pointing to the bookshelf → fingerprint match at the bookshelf → alibi contradiction at the suspect board → final coded location reveals a paper coin in an open box on the activity table.
Twist: The “thief” turns out to be the museum curator who hid the coin to test the detectives. Reward: real chocolate coins for everyone.
Story 3: Where Is Mr. Whiskers? (Ages 8–14)
Setup: The family’s stuffed-cat mascot, Mr. Whiskers, is gone. Three suspects, each with motive: the cat-allergic uncle, the baby cousin who loves carrying things, the dog. The kids must combine handwriting analysis, fiber matching, and a final cipher to locate Mr. Whiskers.
Evidence trail: Note in pigpen cipher under the welcome mat → fur evidence near the laundry room (matches the dog) → teeth marks too small for the dog (eliminates suspect) → final clue points to an open toy basket in the marked play area — where Mr. Whiskers is waiting.
Twist: The baby cousin “rescued” Mr. Whiskers because she saw the dog playing too rough with him. Everyone wins.
Detective Vocabulary: 12 Terms to Drop Into Your Hunt
Real-detective language makes kids feel grown up. Sprinkle these into the briefing, the clue cards, and the interrogation script.
- Alibi: An explanation of where someone was when the crime happened.
- Suspect: A person who might have done it.
- Witness: Someone who saw or heard something useful.
- Motive: The reason someone might have done it.
- Evidence: Anything that proves what happened (prints, notes, objects).
- Red herring: A clue that looks important but leads you the wrong way.
- Lead: A piece of information worth following up.
- MO (modus operandi): The suspect’s usual way of doing things.
- Case file: The folder where you keep all the evidence and notes.
- Chain of custody: Keeping evidence labelled so it doesn’t get mixed up.
- Crime scene: The place where it happened.
- Solve: What you do when all the evidence points to one suspect.
Real Skills Your Detective Hunt Actually Develops
Parents sometimes ask whether a detective hunt is “just a game” or whether kids get something concrete out of it. Based on 200+ hunts run with kids ages 6–15, three skill groups consistently strengthen.
Cognitive: Deductive reasoning (eliminating suspects), pattern recognition (cipher decoding), working memory (holding multiple clues in mind), reading comprehension under pressure. A 45-minute hunt asks more sustained reasoning of a 9-year-old than a typical hour of homework.
Social: Turn-taking, splitting tasks across teammates, defending a theory when others disagree, listening to a quieter teammate’s idea (because that idea might crack the case). Detective hunts work especially well for shy kids: their thinking-out-loud contributes equally to a noisy kid’s running-around contribution.
Emotional: Frustration tolerance (a stuck clue is genuinely frustrating — and then genuinely satisfying when it cracks), patience, and the specific confidence that comes from solving something hard. The phrase we hear most often from parents 24 hours later is “they keep asking when we can do another one”.
5 Common Mistakes (and How to Avoid Them)
These are the mistakes that turn a great hunt into a so-so one. I’ve made all five myself.
Mistake 1: Too many clues. 25 clues for a 7-year-old leads to clue-fatigue at minute 35. Stick to 8–10 for ages 6–8, 10–14 for ages 9–11, 14–18 for ages 12+. Fix: Cut your draft clue list in half.
Mistake 2: All clues the same difficulty. Easy-easy-easy bores older kids; hard-hard-hard kills momentum for younger ones. Fix: Mix three difficulty levels. Open with two easy wins to build confidence, end with two harder challenges, fill the middle with medium.
Mistake 3: Hidden too well. A clue under a stack of books that takes 8 minutes to find isn’t a clue, it’s a search. Fix: The clue should take 30–60 seconds to locate once kids are in the right area. The challenge is in the riddle, not in the hiding.
Mistake 4: No story arc. A hunt that ends with “you found the treasure!” feels flat compared to “you proved Aunt Margaret did it — here’s the cake!” Fix: Plan the reveal moment before you plan the clues.
Mistake 5: No celebration. Kids cracked the case in 47 minutes. Don’t move straight to cleanup. Fix: Photos with the “case closed” sign, applause, the treasure unwrapping, an “official detective certificate” handed out by a parent in a deerstalker hat.
Free Printable Detective Case File Bundle (PDF)
📁 Detective Case File Bundle — Free Download
A 12-page printable kit that pairs with this guide. Print, hide, and run a polished detective hunt in 15 minutes.
- Case File cover page (Case #, Date, Lead Detective)
- 5 fillable Suspect Lineup cards
- 10 Evidence Log sheets
- Blank Fingerprint Cards (use drawn patterns for matching)
- Cipher Quick-Reference card (Caesar, ROT13, A1Z26, Morse, Pigpen)
- 4 Detective Badge templates (cut-out)
- “Crime Scene — Do Not Cross” banner strip
- Interrogation Worksheet (the 12 questions, ready to fill)
- Final Solution worksheet
Indoor Detective Hunt vs. Outdoor Mystery Mission

Location changes how you structure your hunt.
Indoor Detective Hunts
Pros:
- Works in any weather
- Smaller space = easier supervision
- Prepared hiding spots on low shelves, reachable tables and beside soft furnishings
- Warmer and more comfortable for kids
- Fewer distractions (kids stay focused)
- Easier to control who has access to locations
Cons:
- Limited space for large groups
- Risk of kids hiding in places you didn’t plan
- Harder to use certain props (harder to make a “crime scene” outdoors convincing indoors)
Best for: Apartments, small homes, families with 2–8 kids, cold/rainy climates.
Outdoor Mystery Missions
Pros:
- More space for larger groups
- Natural props: trees, rocks, garden areas, bushes
- Kids can run and move freely
- Feels more “adventurous”
Cons:
- Weather-dependent
- Harder to control the environment
- Need to weatherproof all clues (use plastic sleeves)
- Larger area = harder to supervise
- Neighbors or passersby might interfere
Best for: Large backyards, parks (with permission), warm weather, groups of 8+ kids.
Hybrid Approach
Start indoors (cooler, focused detective work), transition outdoors for the final location or treasure hunt portion. Best of both worlds.
From DIY Clues to Ready-Made Kit: Which Is Right for You?
You have three options: build it yourself, download free templates, or buy a pre-made kit.
DIY (Fully Custom, 2–4 Hours)
Cost: $5–20 (paper, markers, printer ink)
Pros:
- Completely customized to your locations and child’s name
- Total creative control
- Feels personal and unique
Cons:
- Time-intensive (2–4 hours to plan, write, and design)
- Clues may not be tested; you don’t know if they’ll work
- If a clue fails, the whole hunt stalls
- Printing and design quality is usually lower
Best if: You love creative projects, have time, and want maximum personalization.
Free Templates from Google/Pinterest
Cost: Free (but you print)
Pros:
- Zero cost
- Lots of variety available
Cons:
- Quality is wildly inconsistent
- Most require heavy customization
- Finding the right template takes 30+ minutes
- Clues are often generic and not tested
- May need multiple templates to get 8–12 clues
Best if: You have time to hunt for templates and don’t mind editing heavily.
Ready-Made Kit ($14.99)
Cost: $14.99 for a complete kit
Pros:
- The product page lists eight museum-themed stations, four optional bonus games, suspect materials, detective ID cards and a host guide.
- Professional design and printing quality
- Clues are tested and field-proven with hundreds of families
- Preparation: read the host guide, print and cut the materials, gather props and arrange the eight stations. Allow time for your chosen setup.
- Customizable for your child’s name and home
- You can use it year after year
Cons:
- Costs $14.99 (though most families spend $25–40 on party supplies anyway)
- Less fully “custom” than DIY
Best if: You value your time, want reliability, and want professional quality.
Verdict: For most parents, a ready-made kit wins on time-to-quality ratio. DIY makes sense if you love creative projects. Free templates work only if you have several hours to source and customize.
Choose a Ready-Made Museum Mystery for Ages 6–12.
The Detective Scavenger Hunt Kit follows the case of King Eldor’s missing Emerald Crown. The product page describes eight museum-themed stations, four optional bonus games and age versions for 6–9 and 9–12. This is a digital download: an adult prints, cuts and prepares the game before guiding the group.
$14.99 · Instant Download
Detective Hunt FAQ
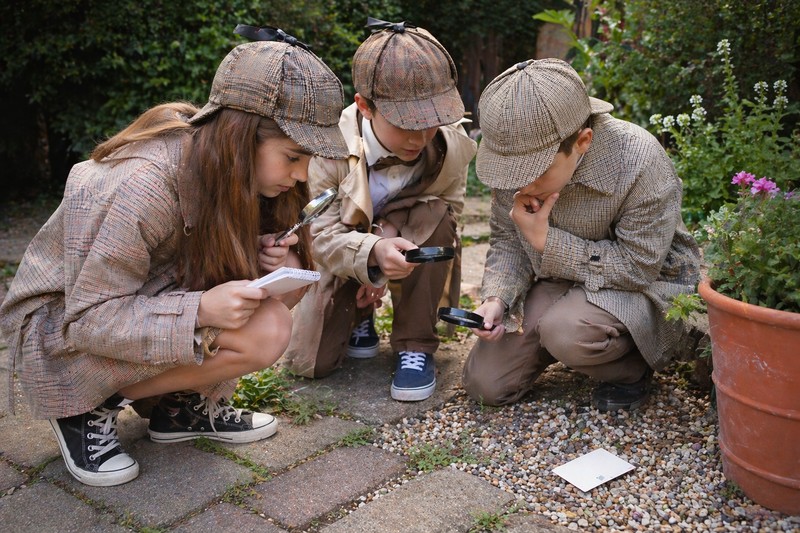
What clues do you use for a detective scavenger hunt?
Detective hunts use five main clue types: location riddles (pointing to rooms or hiding spots), fingerprint analysis (matching prints to surfaces), coded messages (simple ciphers or letter substitutions), alibi-based clues (suspect statements that reveal the next location), and photo or visual clues (images that kids match to locations).
Example: “The witness saw the thief near a place where the family reads together” → Kids find the bookshelf. Or: “Fingerprint analysis matches the suspect’s prints to a surface used for keeping food cold” → Kids check the refrigerator. These are DIY examples from this article, not a list of the paid kit’s contents. The paid Detective Scavenger Hunt uses eight museum-themed stations plus four optional bonus games; check the product page for the included materials.
How is a detective scavenger hunt different from a regular treasure hunt?
A regular treasure hunt is a straightforward search: kids follow clues to find items or a treasure chest. A detective hunt adds narrative and mystery: there’s a crime to solve, suspects to investigate, evidence to analyze, and a culprit to identify. Instead of just “finding the treasure,” kids are “solving the case, finding evidence, and catching the thief.” The treasure is the reward for solving the mystery, not the primary goal. This narrative element keeps kids much more engaged because they’re roleplaying as detectives, not just following directions.
How do you set up a detective scene?
Start by creating a visual “crime scene” at your starting location: print crime scene tape or use caution tape to mark the area. Next, create a suspect board on the wall with photos or drawings of 3–5 suspects. Include names and basic details (“Suspect A: Loves cake, seen near kitchen”). Set up a detective headquarters table with supplies: magnifying glasses, fingerprint kit, notepads, pencils, and evidence envelopes. Print detective badges for each child to wear throughout the hunt. Finally, hide your clues and props in advance, placing them at the locations your clues reference. The visual setup takes about 20 minutes and transforms your space from “regular home” to “detective headquarters.”
What age is a detective scavenger hunt for?
Ages 6–12 are the sweet spot. Ages 6–8 work best with simple location riddles and 5–8 clues (20–30 minute hunts). Ages 9–11 can handle coded messages, fingerprint analysis, alibi logic, and 8–12 clues (30–45 minute hunts). Ages 12+ enjoy complex multi-step logic, red herrings, and 12+ clues (60+ minute hunts). Kids under 6 can participate with very simple clues and adult support. Teenagers enjoy detective hunts if you add real mystery and narrative depth (heist, false leads, twist endings). It’s less about exact age and more about reading level, patience for codes, and desire for a challenging hunt.
How long does a detective scavenger hunt take to plan?
If you write everything from scratch, plan on 2–4 hours: an hour for the crime story and suspect profiles, an hour to write 8–12 clues, and another hour for the props (badges, evidence envelopes, suspect board, fingerprint cards). With a ready-made kit or printable templates, allow time to read the instructions, print and cut, prepare props and check the route. Preparation time varies with the materials and your chosen setup.
What do you put in a detective hunt party bag?
The favourites that consistently get kids talking: a kid-safe magnifying glass, a small notebook and pencil, a “detective ID badge” with their name on it, a mini fingerprint ink-pad (or stickers if you’d rather skip the mess), a printable cipher card, and one small piece of “evidence” (a button, a paperclip, a single coloured ribbon) sealed in a labelled evidence bag.
Can you run a detective scavenger hunt with just two kids?
Yes — in fact, two-kid hunts are some of the best. They give every clue full attention, both kids speak up, and the interrogation phase becomes a proper back-and-forth conversation. Reduce to 6–8 clues, run one combined investigation rather than competing teams, and lean harder into the forensic activities (paper-pattern matching and handwriting comparison) because those scale beautifully to small groups.
What’s the difference between a detective hunt and a spy mission?
A detective hunt is reactive: a crime happened, kids investigate. A spy mission is proactive: kids are agents on assignment, completing objectives before “the enemy” does. Detective hunts emphasise observation and deduction; spy missions emphasise stealth, gadgets and time pressure. Both share clue-mechanics and codes, so the same materials often serve double duty.
“My 8-year-old absolutely LOVED the detective hunt. He asked if we could do it again the next day. Worth every penny!”
— Jennifer C., verified buyer | Detective Scavenger Hunt
About This Article’s Expertise
This guide is based on 200+ detective scavenger hunts designed and tested since 2019. The 30 clue ideas come from real party planning experience with kids ages 6–15, feedback from thousands of parents, and field-testing in homes, backyards, and party venues across the United States. Every clue type, setup step, and age guideline has been validated by parents who’ve run these hunts successfully.
Explore More Mystery Party Ideas
- Detective birthday party — full theme guide with decorations and activities
- Spy missions for kids — agent-style cousins to detective hunts
- Caesar Cipher for Kids — free cipher-wheel PDF and decoder practice
- Escape room birthday party for kids — similar mystery-solving engagement
- Mystery party for teens — advanced detective games and red herrings
- Indoor scavenger hunt for kids — 100+ ideas if the rain takes over
- Scavenger hunt for kids — the ultimate guide
- Birthday games for kids — 40+ games beyond hunts
Your Detective Hunt Won’t Plan Itself.
Start with the 30 DIY clue ideas above, use the linked printable templates, or choose the ready-made museum mystery. Each option still needs adult preparation and a checked play area.