
Blog
Craft Projects
Creative Craft Projects with Kids – Ideas and Step-by-Step Instructions for Every Age
Crafting with kids is a wonderful way to encourage creativity, enjoy quality time together, and naturally support the development of fine motor skills. Whether it’s colorful spring crafts, cozy fall decorations, or homemade Christmas gifts – with the right materials and a bit of imagination, crafting becomes a highlight for the whole family. In this article, I’ve put together some of the most beautiful and creative craft projects suitable for children of all ages. From simple ideas for little hands to more challenging projects for older kids, there’s something for everyone. Let’s get creative together!
The Benefits of Crafting with Kids
Last updated: April 2026 | Reading time: 25 min
All craft projects in this guide have been tested with children and use safe, easily available materials. Step-by-step instructions ensure that kids of all skill levels can follow along.
Before diving into the craft ideas, it’s worth taking a look at the many benefits of crafting with children. Crafting is much more than just a fun pastime – it supports development on many levels and creates memories that last.
- Improves fine motor skills: Cutting, gluing, and painting strengthen small hand muscles and improve hand-eye coordination.
- Encourages creativity and imagination: Crafting gives children the freedom to express their own ideas, experiment with colors, and discover materials in new ways.
- Boosts concentration: While crafting, children learn to focus on a task and complete it step by step.
- Builds self-confidence: Completing a craft project gives kids a real sense of pride and accomplishment.
- Quality family time: Crafting creates meaningful family moments filled with fun, teamwork, and encouragement.
Craft Project 1: Colorful Window Art for Every Season
Window art is a wonderful way to decorate your home for different seasons while helping kids develop an understanding of colors and shapes. This craft is suitable for children ages 3 and up and can easily be adapted.
Materials:
- Colored tissue or translucent paper
- Black construction paper or cardstock
- Child-safe scissors
- Glue stick or tape
- Pencil and ruler
Instructions:
- Draw a simple shape on the black paper – for example, a butterfly for spring, a leaf for fall, or a star for Christmas.
- Carefully cut out the shape, leaving the outer edges intact to form a frame. Cut out the inside so it looks like a “window.”
- Cut the translucent paper into small pieces or strips. Glue them to the back of the black paper to fill the shape with color.
- Attach the finished artwork to a window and enjoy how the colors glow when sunlight shines through.
Tip: Snowflakes, Christmas trees, and stars work especially well during the holiday season. Kids love creating their own window designs that transform the home into a colorful world.
Craft Project 2: Colorful Beaded Bracelets and Necklaces
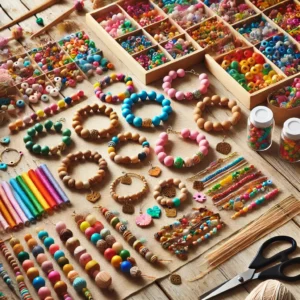
Making jewelry is a fantastic craft project that helps children improve fine motor skills while expressing creativity. Stringing beads is especially enjoyable for kids ages 5 and up.
Materials:
- Colorful wooden, plastic, or natural beads
- Elastic cord or cotton string
- Scissors
- Small charms (optional)
Instructions:
- Cut a piece of elastic cord or string to the desired length.
- Let the children thread beads in any pattern they like, experimenting with colors and shapes.
- Once finished, tie the ends securely.
- Add charms if desired for a personal touch.
Tip: Jewelry made from natural materials like wooden beads or shells is perfect for summer and makes a lovely handmade gift.
Craft Project 3: Fun Animal Masks from Paper Plates
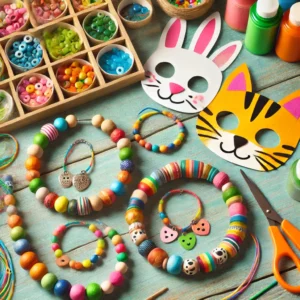
Animal masks are a fun craft kids absolutely love. They’re perfect for pretend play, costume days, or themed parties and offer endless creative possibilities.
Materials:
- Paper plates
- Watercolors or markers
- Craft glue
- Colored paper for ears, noses, and details
- Child-safe scissors
- Elastic band or string
Instructions:
- Paint the paper plate in the colors of the chosen animal.
- Cut out ears, noses, and other details from colored paper.
- Glue the pieces onto the plate to form the animal’s face.
- Attach elastic or string so the mask can be worn comfortably.
Tip: Kids can also create fantasy creatures like unicorns or dragons. For more imaginative ideas, check out our unicorn-themed scavenger hunt tasks: Unicorn Scavenger Hunt Tasks.
Craft Project 4: Tissue Paper Flowers for Spring
These colorful flowers are perfect for spring decorations or as table centerpieces. Making tissue paper flowers improves fine motor skills and is ideal for kids ages 4 and up.
Materials:
- Colored tissue paper
- Pipe cleaners or green wire
- Child-safe scissors
Instructions:
- Cut the tissue paper into squares and stack 6–8 layers.
- Fold the stack accordion-style.
- Wrap a pipe cleaner around the center and twist securely.
- Carefully separate the layers to form a flower shape.
Tip: Combine different colors to create beautiful gradients. These flowers last forever and add bright color to any room.
Craft Project 5: DIY Jar Lanterns
Simple glass jars can be transformed into beautiful lanterns that create a cozy atmosphere indoors or outdoors.
Materials:
- Empty glass jars
- Colored tissue or translucent paper
- Brush
- Craft glue
- Tea lights or LED candles
- Glitter or decorative elements (optional)
Instructions:
- Cut the paper into small pieces.
- Cover the jar with glue and stick the paper pieces all around.
- Add glitter or decorations if desired.
- Let dry completely, then place a candle inside.
Tip: Cut out shapes like leaves or stars to create beautiful shadow effects when the lantern is lit.
Craft Project 6: Handprint Art for Lasting Memories
Handprint art is a simple yet very emotional craft project that creates beautiful keepsakes. These artworks also make wonderful gifts for grandparents or other family members.
Materials:
- Thick paper or canvas
- Acrylic paint or non-toxic finger paint
- Paintbrush
- Black marker (for labeling)
Instructions:
- Choose a color and generously paint the child’s hand.
- Press the painted hand carefully onto the paper or canvas and let it dry.
- Use a black marker to add the date or a short message.
Tip: Layer multiple handprints in different colors to create colorful, abstract artwork that looks great framed.
Craft Project 7: Monster Bookmarks Made from Paper
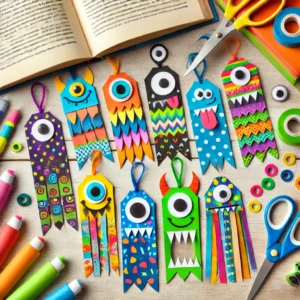
These funny monster bookmarks are perfect for little book lovers. They are easy to make and offer endless creative possibilities.
Materials:
- Colored paper or cardstock
- Child-safe scissors
- Glue stick
- Markers, googly eyes, or stickers (optional)
Instructions:
- Cut a square piece of paper (about 4 x 4 inches) and fold it diagonally into a triangle.
- Fold the triangle corners upward to meet at the top, forming the base of the bookmark.
- Glue a second triangle inside to create a pocket for the page.
- Decorate the bookmark with eyes, teeth, and funny details to create a monster face.
Tip: Use different colors and patterns to create a whole collection of unique monster bookmarks kids will love using.
Craft Project 8: Ladybug Rocks for the Garden
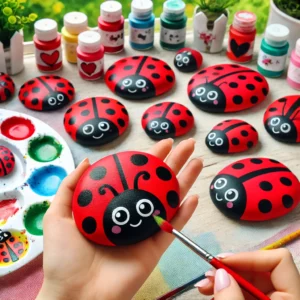
Painting rocks is a simple and fun project that allows kids to express their creativity freely. Ladybug rocks make charming decorations for gardens or balconies.
Materials:
- Smooth, flat stones
- Acrylic paint in red, black, and white
- Paintbrush
- Clear sealant (optional, for durability)
Instructions:
- Clean the stones thoroughly so the paint sticks better.
- Paint the stone red and let it dry.
- Add the ladybug’s head and spots using black paint.
- Finish with small white dots for eyes.
- Seal with clear spray if the stones will be used outdoors.
Tip: Kids can also paint fantasy creatures or other animals, creating a colorful stone collection.
Craft Project 9: Potato Stamps for Creative Patterns
Potato stamping is a quick and easy way to create fun patterns on paper or fabric. Kids can design their own greeting cards, wrapping paper, or even tote bags.
Materials:
- Potatoes
- Sharp knife (adults only)
- Watercolors or fabric paint
- Paintbrush
- Paper or fabric
Instructions:
- Cut a potato in half and draw a simple shape on it.
- Carefully carve away the excess so the design stands out.
- Paint the stamp and press it onto paper or fabric.
- Repeat to create patterns or borders.
Tip: Potato stamps are perfect for custom gift wrap or handmade cards and encourage kids to experiment with shapes and colors.
Craft Project 10: Pom-Pom Animals Made from Yarn
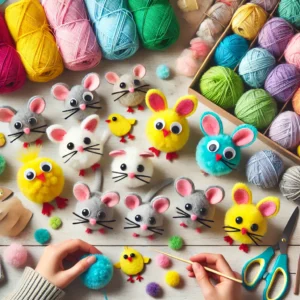
Pom-pom animals are soft, cuddly, and easy to make using leftover yarn. This project is great for kids ages 5 and up and works well as decoration or a small gift.
Materials:
- Yarn in different colors
- Cardboard templates or a pom-pom maker (or a fork)
- Child-safe scissors
- Felt or googly eyes
- Craft glue
Instructions:
- Wrap yarn around the template until thick, then cut and tie tightly in the center.
- Remove the template and trim the pom-pom into a round shape.
- Glue on eyes, ears, and other details to create animals like chicks, bunnies, or mice.
Tip: Try different sizes and colors to create a whole pom-pom animal family. Kids love bringing their little creations to life.
Craft Project 11: Dreamcatchers for Sweet Dreams
A dreamcatcher is not only a beautiful decoration for a child’s bedroom, but also a great craft project that teaches patience and fine motor skills. Making dreamcatchers is especially suitable for kids ages 6 and up.
Materials:
- Embroidery hoop or metal ring
- Yarn or string in different colors
- Feathers and beads
- Scissors
- Craft glue
Instructions:
- Wrap the hoop completely with yarn.
- Start weaving the inner web by looping the yarn around the ring in a spiral pattern.
- Decorate the bottom with feathers and beads.
- Hang the dreamcatcher near the bed to “catch” bad dreams and let only good ones through.
Tip: Dreamcatchers are a great addition to kids’ room décor projects. Children will be proud to display their handmade creations.
Craft Project 12: Lanterns for Fall and St. Martin’s Day
Making lanterns is especially popular in fall but also creates a cozy atmosphere during the winter season. These lanterns are easy to make and perfect for kids.
Materials:
- Translucent paper or parchment paper
- Colored crepe paper
- Glue
- Scissors
- Wire and wooden stick for carrying
- LED tea light
Instructions:
- Cut the translucent paper to size and decorate it with cut-out shapes backed with crepe paper.
- Glue the sides together to form a lantern and attach the wire handle.
- Decorate with glitter or star shapes if desired.
- Place an LED tea light inside to make it glow.
Craft Project 13: Painted Flower Pots for the Garden
Painted flower pots brighten up balconies and gardens and are a wonderful craft project for kids. With different colors and patterns, each pot becomes unique.
Materials:
- Terracotta pots in various sizes
- Acrylic paint or weatherproof paint
- Paintbrushes
- Clear sealant (optional)
Instructions:
- Clean the pots and let them dry so the paint sticks well.
- Let kids paint patterns like dots, stripes, or flowers.
- Once dry, seal the pots to make them weather-resistant.
Craft Project 14: Photo Frames Made from Natural Materials
A photo frame made from natural materials is a great craft idea for spring or fall. Crafting with nature encourages mindfulness and helps kids discover interesting textures.
Materials:
- Sticks, twigs, or bark
- Hot glue gun (adults only)
- Natural materials like moss, small stones, leaves
- Cardboard for the backing
Instructions:
- Arrange the sticks into a rectangular frame and glue the corners together.
- Decorate the frame with natural materials.
- Attach a photo to the back and add a hanger.
Craft Project 15: Butterflies Made from Coffee Filters
Coffee filter butterflies are an easy and magical craft activity. These delicate, colorful butterflies are perfect as spring decorations for windows or plants.
Materials:
- Coffee filters
- Watercolors or markers
- Pipe cleaners
- Spray bottle with water
Instructions:
- Color the coffee filters with markers or watercolors.
- Lightly spray them with water so the colors blend softly.
- Wrap a pipe cleaner around the center to form the butterfly. The ends become antennae.
Tip: These butterflies work beautifully as decorations for a spring-themed scavenger hunt: Spring Scavenger Hunt.
Craft Project 16: Mini Cacti Made from Painted Stones
Mini cacti made from painted stones are a fun, low-maintenance decoration for kids’ rooms. They’re perfect for children who love plants but aren’t quite ready to care for real ones yet.
Materials:
- Smooth, elongated stones
- Green acrylic paint
- White acrylic paint for details
- Small flower pots or cups
- Sand or small pebbles
Instructions:
- Paint the stones in different shades of green and let them dry completely.
- Use white paint to add small spines or patterns to make them look like cacti.
- Fill the pots with sand or pebbles and place the painted stones inside.
Craft Project 17: DIY Envelopes Made from Old Magazines
These envelopes made from old magazines are eco-friendly and eye-catching. They’re perfect for small notes or as creative gift wrapping for vouchers.
Materials:
- Magazine pages or colorful recycled paper
- Envelope template (printable)
- Scissors and glue
- Decorative stickers (optional)
Instructions:
- Cut the magazine paper using the template and fold it into an envelope shape.
- Glue the edges securely and decorate with stickers or drawings if desired.
Tip: These envelopes are perfect for sending handmade cards or little messages. Kids love designing their own envelopes.
Craft Project 18: Felt Finger Puppets
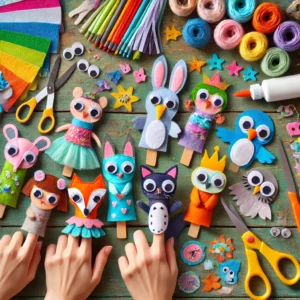
Finger puppets are quick to make and spark children’s imagination. They’re perfect for storytelling and little puppet shows.
Materials:
- Felt in different colors
- Child-safe scissors
- Needle and thread or craft glue
- Markers, googly eyes, and decorative materials
Instructions:
- Cut small felt strips that fit around the child’s finger.
- Decorate the puppets with markers, eyes, and felt details.
- Create animals, fairy tale characters, or fantasy creatures.
Tip: These puppets pair perfectly with a fairy tale–themed scavenger hunt where kids can act out their own stories.
Craft Project 19: Rain Stick Made from Cardboard Tubes
A rain stick is an exciting craft project where kids build their own musical instrument. The gentle sound sparks imagination and works well for storytelling or nature-themed play.
Materials:
- Empty cardboard tube (paper towel roll)
- Rice, lentils, or small beans
- Colored paper and markers
- Tape or hot glue (adults only)
- Aluminum foil
Instructions:
- Seal one end of the tube securely with tape or hot glue.
- Roll aluminum foil into a spiral and place it inside the tube.
- Add a handful of rice or beans and seal the other end.
- Decorate the tube with paper or markers.
Craft Project 20: Pinecone Owls
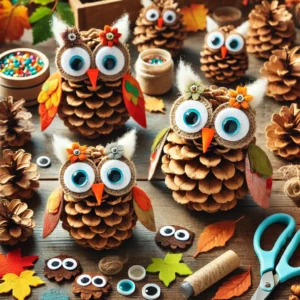
Pinecone owls are a wonderful fall craft and bring a touch of nature into kids’ rooms. This project is perfect for working with natural materials.
Materials:
- Large pinecones
- Felt in different colors
- Googly eyes
- Hot glue (adults only)
Instructions:
- Cut small wings, eyes, and a beak from felt.
- Glue the felt pieces and eyes onto the pinecone to form an owl.
- Display the owls on shelves or windowsills for a cozy fall look.
Tip: These owls fit perfectly with a forest-themed scavenger hunt where kids explore nature and wildlife.
Craft Project 21: Fairy Lights Made from Cupcake Liners
Homemade fairy lights made from cupcake liners are a charming decoration for kids’ rooms, garden parties, or birthdays. This simple project is suitable for children ages 5 and up.
Materials:
- Cupcake liners in different colors and patterns
- LED string lights
- Scissors
Instructions:
- Cut a small slit in the center of each cupcake liner.
- Slide the liners over the individual lights so they look like tiny lampshades.
- Hang up the lights and enjoy the colorful glow.
Craft Project 22: Ladybug Pebbles for Flower Beds

Painted pebbles make a lovely addition to gardens or balconies. These little ladybugs are weather-resistant and brighten up any flower bed.
Materials:
- Flat pebbles
- Red, black, and white acrylic paint
- Paintbrush
- Clear sealant for outdoor use
Instructions:
- Paint the pebbles red and let them dry.
- Add a black head and black dots on the back.
- Use white paint to create the eyes.
- Seal the pebbles to protect them outdoors.
Tip: Kids can create entire ladybug families, making the garden more playful and perfect for a nature-themed scavenger hunt.
Craft Project 23: Simple Cardboard Marble Run
A marble run is an exciting project where kids can design and test their own tracks. It encourages logical thinking and fine motor skills.
Materials:
- Large cardboard box or shoebox lid
- Toilet paper or paper towel rolls
- Tape or hot glue
- Marbles
Instructions:
- Cut the cardboard rolls lengthwise to create half-pipe tracks.
- Attach them inside the box to form a long course.
- Use tape to create turns, tunnels, or ramps.
- Test the track by rolling marbles through it.
Tip: This indoor project works especially well with detective-themed games where kids test their problem-solving skills.
Craft Project 24: Beautiful Vases Made from Old Bottles
Old glass bottles can easily be transformed into beautiful vases. They’re perfect for spring flowers or summer bouquets and add a personal touch to any room.
Materials:
- Empty glass bottles
- Acrylic or glass paint
- Paintbrush
- Jute twine or string for decoration
Instructions:
- Paint the bottles in different colors and let them dry completely.
- Wrap jute twine around the neck for a rustic look.
- Fill the vases with small flowers or greenery.
Tip: These vases pair nicely with other nature-inspired DIY projects.
Craft Project 25: Magical Unicorn Jars
For all little unicorn fans, unicorn jars are a magical craft project that creates a dreamy atmosphere. These jars work beautifully as night lights.
Materials:
- Empty glass jar
- Pastel acrylic paints
- Paintbrush
- Craft glue and glitter
- Small LED string lights or LED tea light
Instructions:
- Paint the jar with pastel colors and let it dry.
- Apply glue in patterns and sprinkle glitter on top.
- Place LED lights inside to make the jar glow.
Tip: These magical jars are a perfect match for a unicorn-themed scavenger hunt and add sparkle to any fantasy party.
Craft Project 26: Bubble Art Paintings
Bubble art is a fun and creative way for kids to make unique artwork. Blowing colorful bubbles onto paper creates exciting patterns and is perfect for summer afternoons outdoors.
Materials:
- Bubble solution
- Food coloring in different colors
- Straws
- Thick paper or watercolor paper
Instructions:
- Divide the bubble solution into small containers and tint each one with food coloring.
- Use a straw to blow bubbles onto the paper.
- As the bubbles pop, colorful ring patterns will form.
Craft Project 27: Rainbow Paper Mobiles
A rainbow mobile is not only beautiful to look at, but also easy to make. It’s perfect for learning colors and creating cheerful room decorations.
Materials:
- Colored paper in rainbow shades
- Craft glue
- Scissors
- String and wooden ring
Instructions:
- Cut different shapes such as circles or hearts from the colored paper.
- Glue the shapes along strings.
- Attach the strings to the wooden ring.
- Hang the mobile so it moves gently in the air.
Craft Project 28: Homemade Playdough
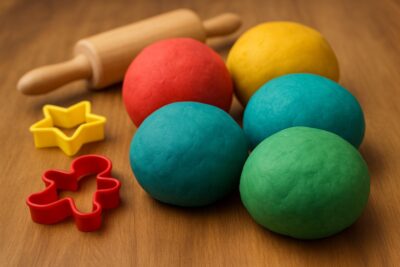 Making playdough at home is a fantastic craft project where kids can create their own colors and shapes. With just a few ingredients, you can make soft, non-toxic dough.
Materials:
- 14 oz flour
- 7 oz salt
- 2 tbsp oil
- 2 cups water
- Food coloring
Instructions:
- Mix flour, salt, and oil in a large bowl.
- Heat the water and add food coloring.
- Slowly pour the colored water into the dry mixture and stir well.
- Let the dough cool, then knead until smooth.
Tip: Playdough is perfect for birthday parties or playdates. You’ll find detailed instructions and tips here: How to Make Playdough.
Craft Project 29: Mini Greenhouse Made from Egg Cartons
This mini greenhouse brings spring indoors and shows kids how plants grow. It’s an educational project that teaches patience and responsibility.
Materials:
- Empty egg carton
- Potting soil
- Seeds (such as cress or radishes)
- Spray bottle with water
Instructions:
- Fill each egg cup with soil and place one seed inside.
- Lightly spray with water and place in a sunny spot.
- Water regularly and observe the plants grow.
Craft Project 30: DIY Jewelry Boxes Made from Matchboxes
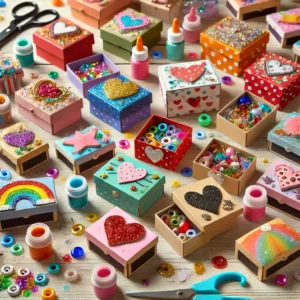
Jewelry boxes made from matchboxes are easy to create and perfect for storing small treasures. Kids love decorating their own little boxes.
Materials:
- Empty matchboxes
- Colored paper and decorative stickers
- Glue stick
- Scissors
- Glitter, beads, or decorative elements
Instructions:
- Cover the outside of the matchboxes with colored paper or paint them.
- Decorate with glitter, beads, or stickers.
- Use the finished box to store small treasures or jewelry.
Craft Project 31: Photo Frames Made from Popsicle Sticks
Photo frames made from popsicle sticks are a classic and popular craft project. Kids can design their own frames and turn them into thoughtful gifts for parents or grandparents.
Materials:
- Popsicle sticks
- Craft glue
- Colored paper, glitter, or decorative materials
- Scissors
Instructions:
- Glue the popsicle sticks together to form a rectangular frame and let it dry.
- Decorate the frame with glitter, stickers, or drawings.
- Glue a photo to the back and attach a string for hanging.
Craft Project 32: Cork Boats for Water Play
Small boats made from corks are a fun summer project and perfect for water play in a kiddie pool or bathtub. They float well and are easy to build.
Materials:
- 5 corks per boat
- Rubber bands
- Toothpicks
- Colored paper or fabric for the sail
Instructions:
- Secure three corks together with rubber bands to form the base.
- Cut a sail from paper or fabric and attach it to a toothpick.
- Insert the toothpick into one of the corks.
Craft Project 33: Sand Art in Picture Frames
Sand art brings beach vibes indoors. Using colored sand and decorative elements, kids can create beautiful artwork to display at home.
Materials:
- Picture frame without glass
- Colored sand
- Craft glue
- Shells, small stones, or driftwood
- Paintbrush
Instructions:
- Cover the backing of the frame with glue.
- Sprinkle sand in patterns or shapes.
- Add shells or stones while the glue is still wet.
- Let dry completely before hanging.
Craft Project 34: DIY Lava Lamp in a Jar
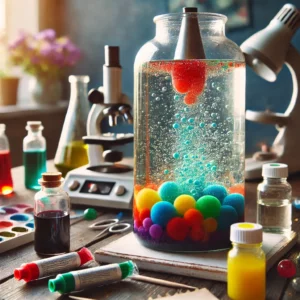
A homemade lava lamp brings a touch of magic and science into kids’ rooms. This fun experiment sparks curiosity and sensory exploration.
Materials:
- Empty glass jar
- Water
- Vegetable oil
- Food coloring
- Effervescent tablet
Instructions:
- Fill the jar about one-quarter with water, then add oil.
- Add a few drops of food coloring.
- Drop in an effervescent tablet and watch the bubbles rise.
Tip: This project is a fun introduction to simple science experiments for kids.
Craft Project 35: Recycling Robots Made from Cardboard
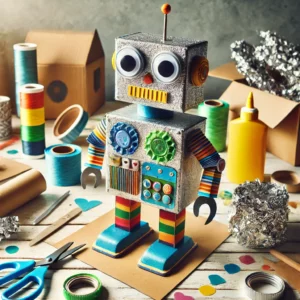
A robot made from recycled materials is a creative way to talk to kids about sustainability while letting their imagination run wild.
Materials:
- Various cardboard boxes
- Aluminum foil
- Colored paper or stickers
- Googly eyes or bottle caps
- Hot glue (adults only)
Instructions:
- Stack and attach the boxes to form a robot shape.
- Cover parts with foil for a metallic look.
- Add eyes and decorate with paper or stickers.
Tip: This recycling robot works perfectly with environmental or sustainability-themed activities for kids.
Craft Project 36: Quick Guide – Making a Magic Wand with Kids
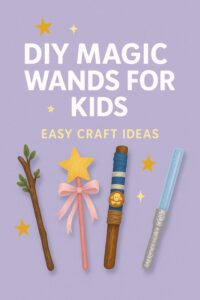 A magic wand is a simple yet magical craft project that sparks children’s imagination. It’s perfect for role play, wizard games, or magic-themed parties.
Materials:
- Wooden stick (chopstick or small branch)
- Acrylic paint
- Craft glue or hot glue (adults only)
- Glitter, beads, or small stars
- Ribbons or crepe paper for decoration
Instructions:
- Base coat: Paint the wooden stick in your chosen color and let it dry completely.
- Decorate: Add glitter, beads, or stars using craft glue.
- Add ribbons: Tie ribbons or crepe paper to one end for a magical effect.
- Dry: Let the wand dry fully before playing.
Tip: This magic wand pairs perfectly with wizard-themed games and fantasy scavenger hunts!
Learn more in the detailed guide: How to Make a Magic Wand
Craft Project 37: Leaf Printing on Tote Bags
Using leaves from the garden, kids can create beautiful natural prints on fabric bags. This sustainable project shows how nature and art can work together.
Materials:
- Plain fabric tote bags
- Large leaves (maple, fern, etc.)
- Fabric paint
- Paintbrush
- Newspaper for protection
Instructions:
- Place newspaper inside the bag to prevent paint bleed-through.
- Brush paint onto the leaves.
- Press the leaves firmly onto the bag to create prints.
- Let the paint dry completely.
Craft Project 38: Quick Guide – Making a Treasure Map with Kids
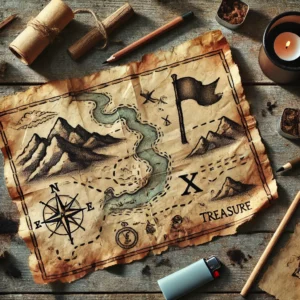
Making a treasure map is an exciting craft project that inspires imagination. Perfect for treasure hunts or pirate-themed parties!
Materials:
- White paper or brown craft paper
- Tea bags or coffee grounds (for aging)
- Colored pencils or markers
- Lighter or scissors (adults only)
Instructions:
- Age the paper: Rub the paper with a damp tea bag or coffee and let it dry.
- Create edges: Tear or trim the edges unevenly. Adults may lightly burn edges for an aged look.
- Design the map: Draw paths, symbols, and mark the treasure with an “X.”
- Decorate: Add mountains, sea monsters, or landmarks.
Tip: This map is perfect for a pirate treasure hunt!
👉 Read the full tutorial here: How to Make a Treasure Map
Craft Project 39: Candle Holders Made from Salt Dough
Salt dough candle holders are a great introduction to working with modeling materials. They’re easy to shape and fun to decorate.
Materials:
- 7 oz flour
- 3.5 oz salt
- ½ cup water
- Acrylic paint or varnish
- Small candles
Instructions:
- Mix flour, salt, and water into a smooth dough.
- Shape candle holders and press a small indent for the candle.
- Let dry completely, then paint or seal.
Tip: These candle holders combine beautifully with other seasonal DIY decorations.
Craft Project 40: Colorful Bookmarks Made from Felt and Beads
This colorful bookmark project is perfect for little book lovers. Kids can customize their bookmarks and create a useful accessory for reading time.
Materials:
- Felt in different colors
- Craft glue
- Colorful beads
- Scissors
- Needle and thread
Instructions:
- Cut a long strip of felt and sew or glue it together.
- Decorate with beads and shape the ends creatively.
- Use the bookmark to mark pages in books.
Craft Project 41: Paper Roll Binoculars for Adventure Play
These simple binoculars are perfect for pretend play, outdoor exploration, or scavenger hunts. Kids love using them to spot clues and animals.
Materials:
- 2 empty toilet paper rolls
- Craft glue or tape
- Colored paper or paint
- String or yarn
- Stickers or markers
Instructions:
- Glue the two paper rolls together side by side.
- Decorate them with paint, paper, or stickers.
- Punch holes on the sides and attach a string to wear around the neck.
Tip: These binoculars are a fun addition to nature walks and outdoor scavenger hunts.
Craft Project 42: DIY Wind Chimes from Recycled Materials
Wind chimes made from recycled materials create gentle sounds and encourage kids to experiment with sound and movement.
Materials:
- Sticks or a small branch
- String
- Metal lids, shells, keys, or beads
- Scissors
Instructions:
- Tie strings of different lengths to the branch.
- Attach recycled items to the strings.
- Hang the wind chime outside where it can move freely.
Tip: Let kids test which materials make the most interesting sounds.
Craft Project 43: Finger Painting with Texture Tools
Finger painting becomes even more exciting when kids use different tools to create textures and patterns.
Materials:
- Finger paint
- Paper or cardboard
- Sponges, forks, toothbrushes
- Apron or old clothes
Instructions:
- Dip fingers or tools into paint.
- Press, drag, or dab onto paper to create textures.
- Mix colors and experiment freely.
Tip: This activity is perfect for younger kids and sensory play.
Craft Project 44: DIY Masks from Cardboard and Fabric Scraps
Making masks allows kids to create characters and step into imaginative roles. Great for costume play and parties.
Materials:
- Cardboard
- Fabric scraps
- Elastic band
- Glue
- Scissors
Instructions:
- Cut mask shapes from cardboard.
- Decorate with fabric scraps and draw details.
- Attach elastic bands so the mask can be worn.
Craft Project 45: Nature Collages from Leaves and Flowers
Nature collages are a calming craft that encourages kids to observe and appreciate the natural world.
Materials:
- Leaves, flowers, and twigs
- Paper or cardboard
- Craft glue
Instructions:
- Collect natural materials during a walk.
- Arrange them on paper into pictures or patterns.
- Glue everything in place and let dry.
Tip: This project pairs wonderfully with forest or nature-themed scavenger hunts.
Craft Project 46: Snowflake Crafts – Simple Winter Decorations

Homemade paper snowflakes are a classic winter craft that never gets old. Each snowflake turns out unique and magical.
Materials:
- White paper
- Scissors
- Markers, glitter, or stickers
Instructions:
- Cut a square from the paper and fold it several times into a triangle.
- Carefully cut small shapes along the edges.
- Unfold the paper to reveal a unique snowflake.
Tip: Snowflakes look beautiful as window decorations or gift tags.
Craft Project 47: Unicorn Horn Decorations

Unicorn horn decorations are a magical craft idea that kids absolutely love. Perfect for parties or imaginative play.
Materials:
- Cardboard or foam sheet
- Crepe paper or glitter paper
- Glue
- Scissors
Instructions:
- Roll the cardboard into a cone shape and glue it closed.
- Wrap the cone with crepe or glitter paper.
- Add ribbons or decorative details as desired.
Craft Project 48: Folding a Paper Boat
Folding a paper boat is a timeless craft activity that combines creativity with simple geometry.
Materials:
- 1 sheet of rectangular paper (A4 or Letter size)
Instructions:
- Fold the paper in half lengthwise, then widthwise.
- Fold the top corners down to the center line.
- Fold the bottom edges up and shape the boat.
Tip: These paper boats float wonderfully in bathtubs or small pools.
Craft Project 49: Jellyfish Lanterns
Jellyfish lanterns create a magical underwater atmosphere and are perfect for themed parties or lantern parades.
Materials:
- Paper lantern
- Crepe paper strips
- Glue and scissors
- LED light
Instructions:
- Attach crepe paper strips to the bottom of the lantern.
- Decorate the lantern with glitter or metallic details.
- Insert an LED light and hang the lantern.
Craft Project 50: Seaweed Garlands for Underwater Decorations
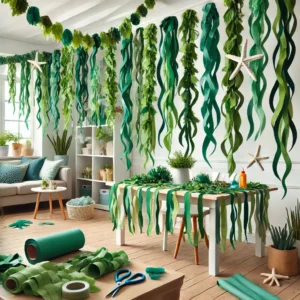
Seaweed garlands are an easy and effective way to decorate rooms for underwater or ocean-themed parties.
Materials:
- Green crepe paper or fabric
- Scissors
- Glue or needle and thread
- String
Instructions:
- Cut the paper into long, wavy strips.
- Add small cuts or fringes for a realistic look.
- Attach the strips to a string and hang as a garland.
Conclusion
Craft projects with kids are much more than a fun way to pass the time. They support fine motor skills, creativity, and problem-solving while creating lasting memories. Whether you are crafting with natural materials, recycled items, or colorful decorations, these projects offer something for every age and season.
From simple paper crafts to imaginative themed decorations, this collection provides endless inspiration for creative afternoons at home, birthday parties, or school projects. If you are looking for even more kid-friendly DIY ideas, be sure to explore our other creative guides and scavenger hunt activities on riddlelicious.com.
Also check out our guide on wax pouring crafts!
Paper Clue Scavenger Hunt
$4.99 — View & Download